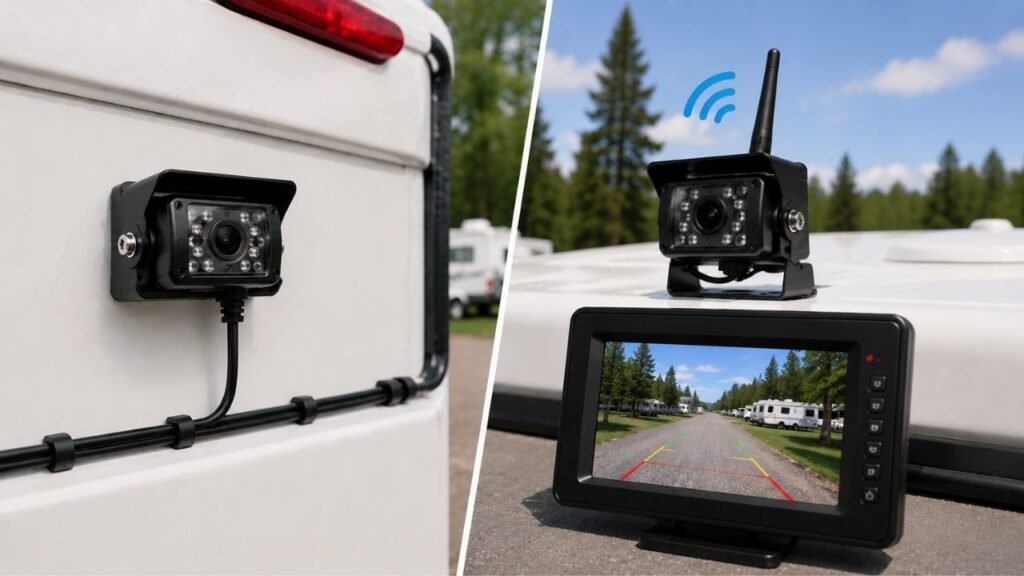
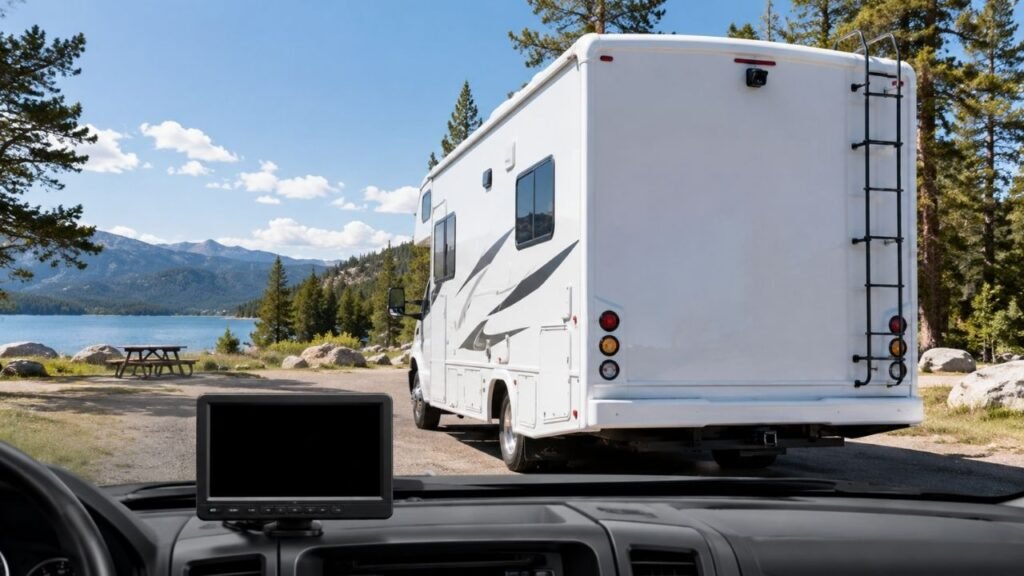
An RV backup camera screen usually turns black because the monitor has power but the camera is not sending a usable video signal. Common causes include loss of camera power, loose wiring, a bad ground, incorrect monitor input, wireless pairing problems, damaged cables, unstable power, or a failed camera or display.
The good news is that many of these problems can be checked without replacing the entire system. I’ll walk you through the symptoms, likely causes, and troubleshooting steps so you can narrow down exactly where the problem is.
Key Takeaways
- A powered monitor does not always mean the rear camera has power.
- A black screen and a “No Signal” message can indicate different problems.
- Many RV cameras receive power through running or reverse lights.
- Loose connections and bad grounds often cause intermittent black screens.
- Wireless cameras can fail because of pairing, range, or interference issues.
- Check power, wiring, and connections before replacing the camera.
- Moisture inside the camera housing can permanently damage the electronics.
- Repeatedly blown fuses usually indicate an electrical problem that needs attention.
First, What Does Your RV Backup Camera Screen Actually Show?
Before taking anything apart, look closely at what the monitor is doing. Small differences in the screen behavior can point you toward the correct part of the system.
| What You See | Most Likely Problem Area | What to Check First |
| Monitor completely off | Monitor power | Power cable, outlet, fuse |
| Monitor on but screen is black | Camera power or video feed | Camera power and connections |
| “No Signal” message | Camera power or wireless connection | Pairing, antenna, camera power |
| Picture flickers, then goes black | Loose connection or unstable power | Wiring, ground, voltage |
| Works only in reverse | Reverse-light power circuit | Camera wiring setup |
| Works only with running lights on | Running-light power circuit | Turn running lights fully on |
| Works when monitor is close | Weak wireless signal | Antennas and interference |
| Fails after rain or washing | Moisture intrusion | Camera housing and connectors |
| Goes black over bumps | Loose wiring or ground | Camera and power connections |
Pay attention to these clues before replacing parts. They can save you a surprising amount of unnecessary work.
Why Is My RV Backup Camera Screen Black?
A black RV backup camera screen usually comes down to power, signal, wiring, or hardware. Start with the simple causes because road vibration and trailer wiring create problems far more often than many RV owners expect.
The Rear Camera Is Not Getting Power
One of the easiest mistakes is assuming the camera has power because the monitor turns on.
The monitor and rear camera usually receive power from different places. Your monitor may be powered through a dashboard outlet while the camera receives power from the trailer’s lighting circuit.
That means you can have a perfectly bright monitor with a completely dead rear camera.
Check whether the camera has a small power or status light. If it does, see whether that light appears when the system should be active.
If the camera has no visible indicator, you may need to test its power connection.
Your Running or Marker Lights Are Not Turned On
This is particularly common with travel trailers and fifth wheels.
Many RVs come prewired for a rear observation camera. Instead of giving that camera constant power, the factory wiring may connect it to the running or marker-light circuit.
When those lights are off, the camera is off too.
Try switching your tow vehicle’s lights fully on.
Do not rely only on the automatic headlight setting. Depending on the vehicle and trailer wiring, the running-light circuit may not be active the way you expect.
If the picture suddenly returns, you may not have a broken camera at all. Your system may simply be wired to operate with the running lights.
The Camera Is Wired to the Reverse-Light Circuit
Some RV cameras receive power from the reverse-light circuit instead.
In that setup, the camera powers on only when the tow vehicle is shifted into reverse.
This is useful for a traditional backup camera. However, it prevents the camera from being used as a continuous rear observation camera while driving.
If your camera works perfectly in reverse but turns black when you shift into drive, check how it was wired before assuming something has failed.
You may need a different power source if you want continuous rear viewing.
A Fuse Has Blown
A blown fuse can cut power to either the monitor or camera.
Depending on the installation, the affected fuse might protect:
- The monitor power outlet
- Reverse lights
- Trailer running lights
- Camera wiring
- An accessory circuit
Use your RV, tow vehicle, or camera manual to identify the correct fuse.
If you find a blown fuse, replace it only with the specified amperage.
Never install a higher-rated fuse just because the correct fuse keeps blowing.
If the replacement fuse blows again, there may be a short circuit, damaged wire, or failed component. Replacing fuse after fuse will not solve that problem.
The Camera Has a Poor Ground
A bad ground can cause confusing camera problems.
The camera may work one minute and fail the next. You might see flickering, lines, intermittent video, or a completely black screen.
Road vibration can loosen a ground connection over time. Moisture and corrosion can also increase resistance at the connection.
Inspect the ground wire where it attaches to the RV or trailer.
The connection should be:
- Tight
- Clean
- Free from rust
- Free from heavy corrosion
If the camera starts working after the ground is cleaned and tightened, you have probably found the problem.
A Connector Is Loose or Corroded
An RV takes much more vibration than equipment sitting inside a house.
Every mile can shake camera plugs, inline connectors, antennas, and wiring joints.
Start at the rear camera and inspect every connection you can safely access.
Look for:
- Partially disconnected plugs
- Bent connector pins
- Green corrosion
- White oxidation
- Water inside connectors
- Damaged seals
- Loose threaded antenna connections
Disconnecting and firmly reconnecting a plug can sometimes restore the video immediately.
If you find corrosion, clean the connection with an electrical contact cleaner intended for that purpose.
Make sure everything is dry before reconnecting the system.
The Monitor Is Set to the Wrong Input or Camera Channel
Many RV camera monitors support several cameras.
You might have:
- Camera 1
- Camera 2
- Camera 3
- AV1
- AV2
- Split-screen mode
It is surprisingly easy to press a button and change the selected input.
The monitor may then display a black screen even though the rear camera is working normally.
Cycle through the available camera channels or inputs.
If you recently changed monitor settings, added another camera, or disconnected the battery, check this before doing anything more complicated.
The Wireless Camera Lost Pairing
Wireless RV cameras must establish a connection with the monitor.
If that pairing is lost, the monitor may display a black screen or a “No Signal” warning.
Pairing can sometimes be disrupted after:
- Disconnecting power
- Replacing the monitor
- Resetting the system
- Changing channels
- Electrical interruptions
- Installing another camera
Follow the pairing procedure for your exact camera model.
Do not assume every RV backup camera uses the same reset process. Some systems have a pairing button on the camera, while others require a menu option on the monitor.
The Wireless Signal Is Too Weak
A camera can have power and still fail to reach the monitor.
Long travel trailers and fifth wheels create a challenging environment for wireless signals. The camera may be many feet behind the driver’s seat with metal framing, walls, appliances, and cargo between the transmitter and receiver.
Try moving the monitor closer to the camera temporarily.
If the picture appears when the monitor is nearby, the camera itself may be fine.
Check:
- Camera antenna position
- Monitor antenna position
- Loose antenna connections
- Metal objects blocking the signal
- Other wireless devices
- Distance between camera and monitor
Sometimes simply repositioning an antenna can make a noticeable difference.
The Video Cable Is Damaged on a Wired System
Wired cameras avoid wireless interference, but they depend on a long physical cable.
That cable can become:
- Pinched
- Crushed
- Cut
- Stretched
- Rubbed through
- Disconnected
Pay special attention to areas where the wire enters or exits the RV.
Those transition points often take the most abuse.
Also inspect sections near moving components, storage compartments, frame members, and places where previous repairs were made.
A damaged video cable may need replacement rather than another camera.
The Camera Is Receiving Unstable Power
Sometimes a camera technically receives power but still cannot operate correctly.
Some newer tow vehicles control trailer lighting circuits using pulsed electrical signals rather than a perfectly steady supply.
Your trailer lights may work normally while a camera connected to the same circuit behaves differently.
Possible symptoms include:
- Flickering picture
- Intermittent black screen
- Repeated “No Signal”
- Camera working with one tow vehicle but not another
- Camera working from another power source
If you suspect this problem, check the recommendations for your specific camera and tow vehicle combination.
Some systems require a manufacturer-approved power adapter, filter, or different wiring arrangement.
Avoid installing random resistors or electrical parts without knowing what your system requires.
Water Has Entered the Camera or Connector
The rear of an RV gets hit with rain, road spray, dirt, and pressure from washing.
A small crack in the camera housing or damaged connector seal can let moisture reach the electronics.
Look closely for:
- Fog behind the lens
- Water droplets inside the housing
- Corrosion inside connectors
- Cracks around the camera
- Damaged cable seals
If water has reached the internal camera electronics, the camera may need replacement.
Drying the exterior will not repair internal corrosion.
The Camera Module Has Failed
Cameras do eventually fail.
However, I would not replace the camera until you have checked its power, ground, wiring, connection, and monitor settings.
A failed camera becomes more likely when:
- Correct power reaches the camera.
- The ground tests good.
- Connections are clean and secure.
- The monitor works with another camera.
- The camera fails on another compatible input.
At that point, the camera itself becomes the strongest suspect.
The Monitor or Video Input Has Failed
The monitor can also fail even when its menus still appear normally.
A display may power up and allow you to change settings while the internal video input no longer processes the camera signal.
That is why a glowing screen does not completely rule out monitor failure.
If several known-good cameras fail on the same monitor, the monitor or its input circuitry deserves closer attention.
Can a Dirty Camera Lens Really Cause a Black Screen?
A dirty lens can make an RV backup camera picture extremely dark, blurry, or completely unusable. Heavy mud, snow, ice, road grime, or condensation can block almost the entire view.
However, dirt usually does not create a true electronic black screen.
If the monitor displays pure black with no visible image at all, I would check camera power and signal before blaming the lens.
Still, cleaning the lens takes only a moment.
Use a soft microfiber cloth and a cleaner that will not damage the lens coating. Avoid abrasive pads because tiny scratches can permanently reduce picture quality.
If the lens looks foggy from the inside, the problem is different. Internal condensation suggests moisture has entered the camera housing.
How to Fix an RV Backup Camera Black Screen
You will save time if you troubleshoot in a consistent order instead of replacing parts randomly.
Follow these steps:
- Do not depend on the camera while it is malfunctioning. Use mirrors and a spotter when backing whenever possible.
- Confirm the monitor powers on. If it does not, check its power cable, outlet, and fuse.
- Check screen brightness and input settings. Make sure brightness has not been turned down and the correct camera channel is selected.
- Activate the camera’s power circuit. Turn on running lights or shift into reverse if your installation requires it.
- Look for a camera power light. A missing indicator can point toward a power problem.
- Power-cycle the system. Turn the monitor and camera completely off, restore power, and test again.
- Re-pair the wireless camera. Follow the instructions for your exact system.
- Reseat accessible connectors. Unplug and firmly reconnect camera, monitor, transmitter, and antenna connections.
- Inspect for corrosion and moisture. Pay close attention to exterior connectors.
- Check the correct fuse. Replace a blown fuse only with the proper amperage.
- Inspect the camera ground. Make sure the connection is clean and secure.
- Move the wireless monitor closer. If the video returns, investigate range or interference.
- Inspect the video cable on wired systems. Look for crushed, cut, or pinched sections.
- Measure power at the camera if needed. Test while the correct camera circuit is active.
- Test the camera and monitor separately when possible. This helps determine which component has actually failed.
Start with the easy checks. A loose plug or inactive running-light circuit can look like a major camera failure.
How Can You Tell Whether the Camera, Wiring, or Monitor Is Bad?
You can usually isolate the failed part by testing one section of the system at a time. This is far more reliable than guessing based only on what the screen looks like.
Test Power at the Camera
If you are comfortable using a multimeter, test the voltage at the camera’s power connection.
Make sure the circuit that normally activates the camera is turned on.
For example, turn on the running lights if the camera receives power from that circuit.
Do not assume that any voltage reading automatically proves the supply is correct. Compare the result with your camera’s required operating voltage.
Also watch for voltage that disappears or changes when the problem occurs.
Check the Camera Ground
A camera needs both power and a reliable return path.
Inspect the ground physically before assuming an expensive electronic component has failed.
A rusty screw, loose terminal, or corroded frame connection can create enough resistance to stop the camera from working correctly.
Test With the Monitor Closer to the Camera
This test is useful for wireless systems.
Bring the monitor closer to the rear camera while keeping both units powered.
If the picture suddenly appears, the camera is probably producing a signal.
The problem is more likely related to:
- Distance
- Antenna position
- Interference
- Signal obstruction
That is much cheaper to investigate than replacing a functioning camera.
Swap a Known-Good Camera or Input When Possible
Multi-camera systems can make diagnosis easier.
If you have a working side camera, you may be able to connect it to the rear-camera input, provided the connections and system are compatible.
If the working camera also fails on that input, the problem probably is not the original rear camera.
You can also test the suspected camera on another known-good channel.
If the problem follows the camera, the camera becomes the stronger suspect.
Test the Wired Video Path
For wired systems, inspect the cable from end to end where accessible.
A camera can receive perfect power but still show nothing if its video signal cannot reach the monitor.
Look for damaged connectors, cable cuts, crushed sections, and loose joints.
If the cable disappears inside walls or sealed compartments, professional testing may be easier than dismantling large sections of the RV.
Wired vs. Wireless RV Backup Camera Black Screen Problems
Both system types can show the same black screen, but they often fail for different reasons. Knowing which system you have makes the troubleshooting process much faster.
Wired RV Backup Camera
Start by checking:
- Camera power
- Ground connection
- Video cable
- Inline connectors
- Monitor input
- Damaged cable sections
A wired system does not normally suffer from wireless interference. If both ends have reliable power and the physical video path is intact, diagnosing the fault becomes relatively straightforward.
Wireless RV Backup Camera
Start by checking:
- Camera power
- Pairing
- Selected channel
- Antennas
- Distance
- Metal obstructions
- Wireless interference
- Power quality
Remember that “wireless” usually refers only to the video connection.
The rear camera still needs electrical power.
That power connection is one of the first things I would inspect.
Why Does My RV Backup Camera Work Only When the Running Lights Are On?
Your RV backup camera may work only with the running lights because the camera was wired into the trailer’s marker or clearance-light circuit.
When that lighting circuit turns off, the camera loses power and the monitor loses its video feed.
This setup is common on RVs that are prewired for an observation camera.
If you want the camera available while driving, simply leaving the running lights on may be how the system was designed to operate.
If you want a different setup, have the wiring changed correctly rather than tapping into an unknown power source.
Why Does the Camera Work With One Tow Vehicle but Not Another?
If the camera worked with your old truck but not your new one, do not assume the camera suddenly failed.
Different tow vehicles can supply trailer electrical power differently.
Possible differences include:
- Trailer connector condition
- Ground quality
- Lighting circuit voltage
- Electrical control methods
- Pulsed power
- Factory towing configurations
Start by checking the 7-way connector and trailer-light operation.
Then confirm that the camera receives the type of power required by its manufacturer.
A camera that operates from a separate stable power source but fails on the new truck’s lighting circuit points toward a power compatibility issue.
What If the Screen Goes Black Only While Driving?
An RV backup camera that works while parked but fails on the road often has an intermittent connection or signal problem.
Look for:
- Loose camera power wires
- Poor ground connections
- Partially seated plugs
- Vibration-sensitive connectors
- Damaged video cables
- Weak wireless range
- Loose antennas
- Intermittent camera power
Also notice exactly when the screen fails.
Does it happen:
- After hitting bumps?
- At highway speeds?
- After several minutes?
- When you turn the lights on?
- When the trailer flexes?
Those details can tell you much more than the black screen itself.
For example, a camera that cuts out every time the RV hits a rough section of road strongly suggests a loose physical connection.
What If the Backup Camera Went Black After Rain or Washing the RV?
A failure that starts immediately after heavy rain or washing deserves a close moisture inspection.
Check for:
- Condensation behind the lens
- Water inside the housing
- Wet connectors
- Corroded terminals
- Cracks around the camera body
- Damaged cable seals
- Water around mounting points
Let wet exterior connectors dry before reconnecting them.
If water is visibly trapped inside a supposedly sealed camera, the housing seal has probably failed.
The camera may temporarily work after drying, but internal corrosion can cause the problem to return.
When Should You Replace the RV Backup Camera?
Do not replace the camera just because the monitor is black.
Replacement makes more sense when:
- Proper power reaches the camera.
- The camera has a reliable ground.
- Connectors are clean and secure.
- Wiring has been checked.
- The monitor works with another compatible camera.
- The suspected camera fails on another compatible input.
- Water is trapped inside the housing.
- The camera body is physically damaged.
- Internal failure has been confirmed.
If the existing system is very old and several components are failing, replacing the complete system can sometimes make more sense than repairing each piece separately.
When Is the Monitor Probably the Problem?
Suspect the monitor when other parts of the system have already been proven to work.
For example, the monitor becomes a stronger suspect if several compatible cameras produce no picture on the same display.
You may also notice that:
- The monitor powers on but accepts no video.
- Menus work but camera feeds do not.
- The screen has no backlight.
- The monitor repeatedly restarts.
- The LCD has visible physical damage.
Before replacing it, check the selected input and power connection one more time.
Monitor problems are less common than simple wiring mistakes, but they do happen.
When Should You Stop Troubleshooting and Call an RV Technician?
Basic inspections are fine for many camera problems, but some electrical faults deserve professional attention.
Stop and get help if:
- A replacement fuse immediately blows again.
- Camera wiring becomes unusually hot.
- You smell burnt plastic or insulation.
- You find melted connectors.
- Wiring disappears inside inaccessible RV walls.
- The system is tied into factory multiplexed electronics.
- You are unsure how to test the circuit safely.
- Electrical modifications are needed to correct unstable power.
A backup camera is helpful, but it is not worth creating a larger electrical problem trying to repair it.
How to Prevent Another RV Backup Camera Black Screen
A few simple checks can prevent many camera failures, especially on RVs that spend months outside and travel over rough roads.
- Test the camera before leaving on a trip.
- Check exterior connectors for corrosion.
- Keep camera wiring secured against vibration.
- Inspect cable entry points for rubbing or damage.
- Make sure antennas stay tight.
- Keep moisture out of electrical connectors.
- Inspect the camera housing for cracks.
- Clean the lens with a soft cloth.
- Check your 7-way trailer plug periodically.
- Investigate intermittent flickering before it becomes permanent.
- Follow the camera manufacturer’s power requirements.
A camera that flickers once in a while is often giving you an early warning. Fixing a loose connection now is easier than dealing with a completely black screen while backing into a campsite.
Final Words
When your RV backup camera screen goes black, work through the system in a simple order: power, activation circuit, monitor input, pairing, connections, signal path, and finally the camera or monitor itself.
Try not to jump straight to replacing the camera. A loose ground, inactive running-light circuit, wrong channel, or corroded connector can create the exact same symptom. Once you isolate each part of the system, the real problem usually becomes much easier to find.
Related FAQs
These quick answers cover several common RV backup camera problems that often appear along with a black screen.
Why Is My RV Backup Camera Screen Black but the Power Light Is On?
The monitor’s power light only confirms that the monitor is receiving electricity. The rear camera may still have no power, no ground, no video connection, or no wireless link. Check the camera’s power source and signal connection before replacing the monitor.
Why Does My RV Backup Camera Say No Signal?
A “No Signal” message usually means the monitor is working but cannot receive video from the camera. Check camera power, pairing, antenna connections, selected camera channel, wireless range, and wired video connections.
Why Does My RV Backup Camera Work Only With the Running Lights On?
Your camera is probably powered through the trailer’s running or marker-light circuit. When those lights are switched off, the camera loses power. This can be normal on many prewired travel trailers and fifth wheels.
Can a Bad Ground Cause an RV Backup Camera Black Screen?
Yes. A loose, rusty, or corroded ground can prevent the camera from operating correctly even when power reaches it. Bad grounds can also cause flickering, intermittent video, and screens that fail when the RV hits bumps.
Can Low Voltage Cause an RV Backup Camera to Stop Working?
Yes. A camera may stop producing a stable video signal when its supply voltage falls outside its required range. Low or unstable power can cause flickering, resets, intermittent signals, or a completely black screen.
Why Does My Wireless RV Camera Work Up Close but Not From the Truck Cab?
That usually points toward weak signal strength rather than a failed camera. Check antenna position, loose antenna connections, metal obstructions, interference from electronics, and the distance between the rear camera and monitor.
How Do I Know Whether My RV Backup Camera or Monitor Is Bad?
Test each component separately when possible. If the camera fails on another compatible monitor or input despite having proper power and ground, suspect the camera. If several known-good cameras fail on the same monitor, suspect the monitor.
Can Rain Damage an RV Backup Camera?
Yes. A cracked housing, failed gasket, or poorly sealed connector can allow rainwater inside. Moisture can corrode electrical contacts or damage internal electronics, causing fogging, intermittent operation, or a completely black screen.
Why Does My RV Backup Camera Screen Go Black Over Bumps?
A screen that goes black over bumps usually points toward a loose connection, weak ground, damaged wire, loose antenna, or vibration-sensitive connector. Inspect and secure the camera’s power and signal connections first.
Do I Need to Re-Pair My RV Backup Camera After Disconnecting Power?
Not always. Many systems remember their pairing after power is disconnected, while others may occasionally need to be paired again after a reset or electrical interruption. Follow the pairing instructions for your specific camera system.

Ethan Walker writes about travel routes, outdoor exploration, and road-based adventures. His guides focus on simple planning, dependable gear, and realistic travel advice. He values comfort, safety, and practical experience over hype.