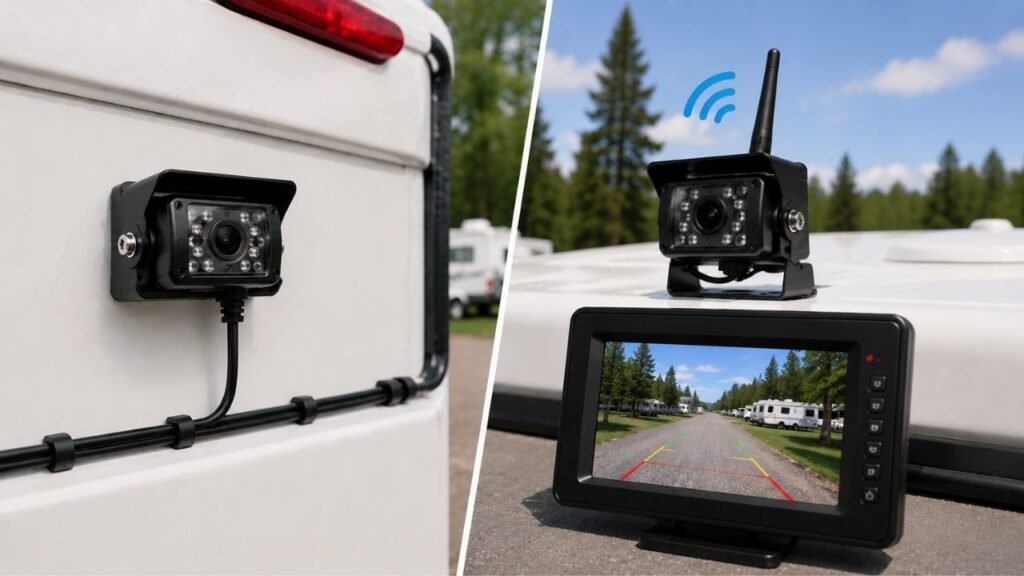
An RV backup camera that keeps disconnecting usually has unstable power, a loose 7-way connection, weak wireless signal, antenna trouble, or lost pairing. Start by confirming the camera receives steady power. Then inspect wiring and antennas before resetting or re-pairing the system.
This guide walks you through the problem in a logical order. You’ll learn how to identify whether power, wiring, interference, pairing, or damaged hardware is causing the connection to drop.
Key Takeaways
- Confirm the rear camera has steady power before changing settings.
- Many trailer cameras receive power through the running-light circuit.
- A loose 7-way connector can cause intermittent camera operation.
- Road vibration can loosen wiring, plugs, antennas, and ground connections.
- Weak wireless range may appear like a camera power failure.
- Nearby Wi-Fi and wireless electronics can interfere with some systems.
- Re-pair the camera only after confirming power and antenna connections.
- Late-model tow vehicles can sometimes create camera power compatibility issues.
- Disconnecting over bumps usually points toward a physical connection problem.
- Persistent problems after testing may indicate failed camera or monitor hardware.
Why Does My RV Backup Camera Keep Disconnecting?
A disconnecting camera does not always mean the camera itself has failed. The pattern of the problem often gives you the best clue.
| What You Notice | Most Likely Cause | First Thing to Check |
| Camera repeatedly turns on and off | Unstable camera power | Voltage and ground |
| Signal drops over bumps | Loose wiring or connector | Camera wiring and 7-way plug |
| Camera works only with lights on | Running-light-powered circuit | Headlight and marker-light setting |
| Problem started with another truck | Power compatibility issue | Tow vehicle trailer-light output |
| Camera works close to monitor | Weak wireless signal | Antennas and signal path |
| Signal drops in certain locations | Wireless interference | Nearby RF devices |
| Monitor shows “No Signal” | Power, pairing, or antenna issue | Camera power first |
| Camera appears completely dead | Fuse, wiring, or ground failure | Camera power circuit |
| Only one camera disconnects | Local camera problem | That camera’s power and antenna |
| All cameras disconnect together | Shared power or monitor issue | Monitor and common power source |
| Problem began after rain | Moisture or corrosion | Camera housing and connectors |
| Wired image flickers | Cable or plug problem | Video cable and connectors |
Try to notice exactly when the failure happens. That detail can save you from replacing perfectly good equipment.
Fix the RV Backup Camera in This Order
Following a consistent troubleshooting order keeps you from chasing several problems at once.
- Park the RV and tow vehicle safely.
- Turn the required running lights on manually.
- Confirm the rear camera has power.
- Disconnect and firmly reseat the 7-way trailer plug.
- Inspect the camera power and ground wiring.
- Check voltage at the camera if possible.
- Tighten the camera and monitor antennas.
- Test the monitor closer to the camera.
- Turn off unnecessary wireless electronics nearby.
- Power-cycle the entire camera system.
- Re-pair the camera with the monitor.
- Investigate tow-vehicle power compatibility.
- Test individual components if the problem continues.
That sequence matters. Re-pairing will not fix a camera that keeps losing electrical power.
Check Whether the Camera Is Losing Power
Power problems are among the most common reasons RV cameras disconnect. A wireless camera still needs a stable electrical supply to transmit video.
Check the Camera Power Indicator
Start by checking whether your camera has a visible indicator light.
Watch that light while the connection drops. If the camera light also goes out, you probably have a power problem rather than a wireless problem.
Remember that your monitor can remain powered while the rear camera loses electricity.
That can make a power failure look exactly like signal loss.
Turn the Running Lights On Manually
Many travel trailers and fifth wheels power rear cameras through marker lights.
In that setup, the camera may receive power only when the running lights are active.
Do not depend entirely on your vehicle’s automatic headlight setting. Some vehicles may not energize the trailer running-light circuit under every condition.
Turn the headlights or running lights on manually and test again.
If the camera suddenly becomes reliable, you have probably identified the power source.
Check the Camera Fuse or Shared Lighting Circuit
A blown fuse usually causes a complete failure. However, loose fuse holders and shared circuits can create intermittent problems.
Check the fuse related to:
- Trailer running lights
- Camera circuit
- Auxiliary trailer power
- Monitor power
- Rear marker lights
Also inspect the fuse holder itself for looseness or corrosion.
Test Voltage at the Camera
If you own a multimeter and feel comfortable using it, measure camera supply voltage.
Test while the camera is operating, not only with everything disconnected.
You want to see whether voltage remains stable when the image drops.
You can also gently move the harness while watching the meter.
A sudden voltage change usually points toward wiring or connector trouble.
Your camera’s acceptable voltage range depends on the manufacturer. Check your specific owner’s manual before judging the reading.
Check the Ground Connection
Do not focus only on the positive power wire.
A poor ground can create the same symptoms as low voltage.
Check for:
- Loose ground screws
- Corroded terminals
- Damaged negative wires
- Poor frame grounds
- Loose splice connectors
- Water inside connections
A circuit may show voltage with a meter but still fail under load because of excessive resistance in the ground path.
Inspect the 7-Way Trailer Connector and Camera Wiring
The 7-way connection deserves close attention on towable RVs. Every bump and turn puts some movement into this connection.
Unplug and Reseat the 7-Way Connector
Disconnect the trailer plug and inspect it closely.
Push it back into the tow vehicle firmly afterward.
The connection should feel secure. Excessive movement can interrupt trailer-light power and affect the camera.
If moving the plug causes the camera to reconnect, you have found an important clue.
Look for Corrosion, Dirt, or Damaged Contacts
Examine both sides of the connector.
Look for:
- Green corrosion
- White residue
- Dirt
- Bent contacts
- Loose terminals
- Moisture
- Burn marks
- Heat discoloration
Corrosion adds electrical resistance and can create unreliable power.
Clean minor contamination using an appropriate electrical contact cleaner. Replace badly damaged connectors rather than repeatedly cleaning them.
Check Whether Road Vibration Triggers the Problem
Pay attention while traveling.
Does the camera disconnect mainly when:
- Crossing rough pavement
- Hitting potholes
- Making turns
- Pulling into driveways
- Driving over bridge joints
- Moving the 7-way cable
That pattern strongly suggests a physical connection issue.
Wireless interference normally does not occur only when the trailer hits bumps.
Inspect Wiring Behind the Camera
Remove the camera cover or mounting access panel when appropriate.
Look for loose plugs and poorly supported wiring.
Pay special attention to:
- Crimp connectors
- Wire nuts
- Quick-splice connectors
- Camera plugs
- Marker-light connections
- Ground wires
Road vibration can slowly loosen connections that worked perfectly when installed.
Could Your Tow Vehicle Be Causing the Camera to Disconnect?
Sometimes the camera works perfectly with one tow vehicle but becomes unreliable with another. Modern vehicle electronics can complicate trailer-camera power.
Why Some Late-Model Trucks Cause Camera Power Problems
Some newer trucks and SUVs electronically control their trailer-light circuits.
Instead of providing power exactly like an older vehicle, the system may pulse, monitor, or manage the electrical output.
Certain wireless RV cameras do not respond well to that type of supply.
The result may look like:
- Repeated camera restarts
- Intermittent picture
- Random disconnects
- Pairing problems
- Camera failure despite working trailer lights
This does not affect every truck or every camera system.
Compatibility depends on the vehicle, camera, and wiring arrangement.
Signs the Tow Vehicle Is the Problem
Look more closely at tow-vehicle power when:
- The camera worked with your previous truck.
- Problems started immediately after changing vehicles.
- The camera works from another 12-volt power source.
- The rear camera repeatedly reboots.
- Trailer lights work while camera performance remains unstable.
- The problem disappears when testing with another tow vehicle.
Those clues can keep you from replacing the camera unnecessarily.
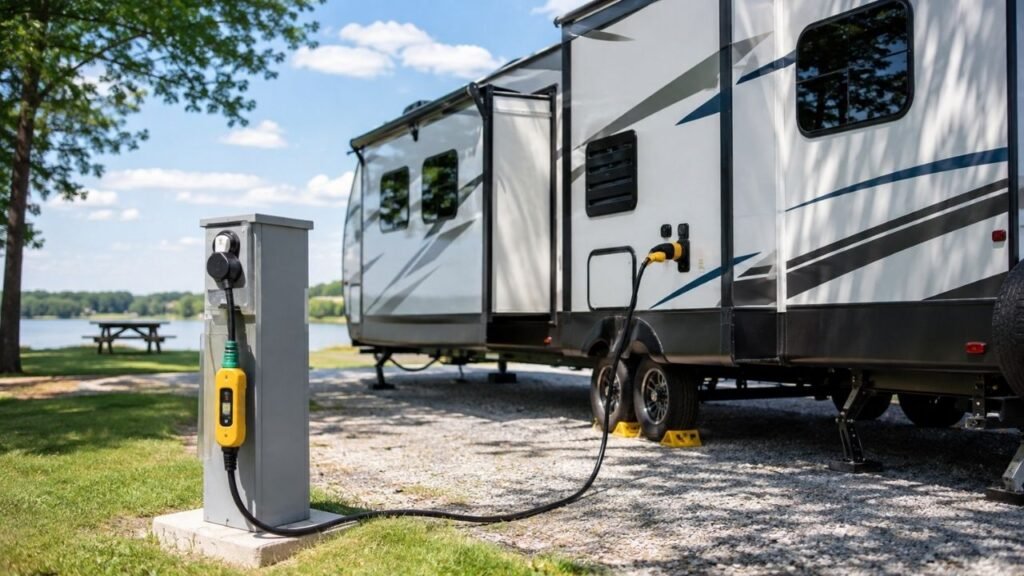
When a 7-Way Camera Power Adapter May Help
Some camera manufacturers offer adapters designed for specific tow-vehicle power issues.
These devices may provide a more usable 12-volt supply to the camera circuit.
However, do not install an adapter automatically.
First confirm that your camera model and tow vehicle actually need one.
Using the correct manufacturer-approved solution is safer than randomly modifying trailer wiring.
When a Power Filter May Be Used Instead
Some systems use an inline filter or power-conditioning device.
These can help when the lighting circuit delivers power differently than the camera expects.
Again, compatibility matters.
Check the camera manufacturer, tow vehicle, and wiring configuration before adding components.
Check the Wireless Antennas Before Re-Pairing
A wireless camera needs both power and a reliable antenna connection. Loose antennas are easy to overlook.
Tighten the Camera Antenna
Check whether the antenna screws onto the camera housing.
Road vibration can gradually loosen threaded antenna connections.
Tighten it by hand without forcing the connector.
A loose antenna can cause intermittent signal despite perfect camera power.
Position the Antenna Correctly
Antenna orientation affects wireless range.
Many RV camera systems perform best when antennas remain upright or follow the manufacturer’s recommended position.
Avoid leaving the antenna folded against metal bodywork.
Also check whether wind moves the antenna while driving.
Check the Monitor Antenna
The monitor antenna matters just as much.
Check for:
- Loose threaded connection
- Damaged hinge
- Poor antenna angle
- Cracked antenna
- Obstruction around the dashboard
A good camera antenna cannot overcome a damaged receiver antenna.
Look for Antenna Damage
Inspect both ends carefully.
Replace an antenna showing:
- Cracks
- Broken hinges
- Corrosion
- Missing sections
- Loose internal movement
- Damaged connectors
Antennas are often cheaper and easier to replace than the entire camera system.
Test Whether Distance or the RV Is Blocking the Signal
Wireless RV cameras sometimes work perfectly at close range but fail from the driver’s seat. That points toward signal strength instead of power.
Move the Monitor Close to the Camera
Bring the monitor closer to the rear camera while parked.
Keep both units powered normally.
If the connection becomes stable at close range, that tells you several things.
The camera is probably transmitting. Pairing is probably working. Distance or obstruction becomes more likely.
Test Again From the Tow Vehicle
Return the monitor to its normal location.
Compare the connection.
If the camera disconnects only from the cab, investigate antenna position and signal blockage.
Long travel trailers and fifth wheels create a demanding wireless path.
Consider RV Construction
Wireless signals must travel through or around the RV.
Possible obstacles include:
- Aluminum body panels
- Metal framing
- Appliances
- Cargo
- Storage compartments
- Toy-hauler garages
- Multiple interior walls
- Large batteries
- Metal tanks
The longer the RV, the more important antenna placement becomes.
Reduce Wireless Interference Around the Camera System
Wireless interference is less common than unstable power, but it still happens. Testing for interference is simple and costs nothing.
Turn Off Nearby Wireless Devices Temporarily
Temporarily switch off unnecessary electronics around the monitor.
Examples include:
- Mobile hotspots
- RV Wi-Fi routers
- Bluetooth accessories
- Extra wireless cameras
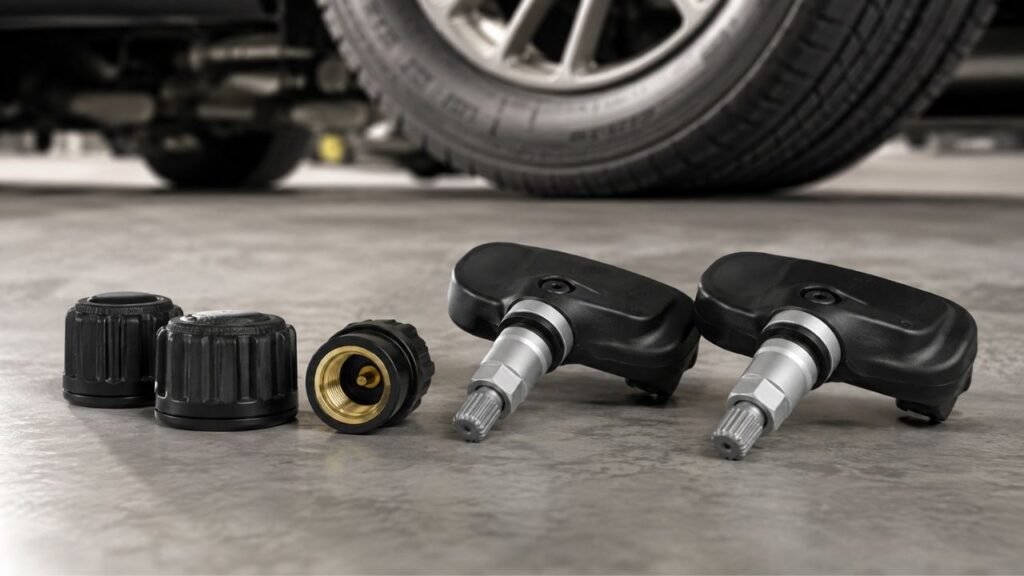
- Wireless tire systems
- Other nearby transmitting electronics
You do not need to leave everything turned off permanently.
This test simply tells you whether another device affects the camera.
Check Whether Disconnects Happen in Certain Locations
Think about where the problem occurs.
Does the camera work on quiet highways but fail around:
- Busy campgrounds
- Large parking lots
- Fuel stations
- Cities
- Truck stops
A location-specific problem can suggest radio-frequency interference.
Power problems usually follow the RV everywhere.
Move the Monitor Away From Other Electronics
Try moving the monitor slightly.
Avoid placing it directly beside:
- Wi-Fi routers
- Phones acting as hotspots
- Wireless displays
- Other transmitting equipment
Even a small position change may improve a marginal connection.
Reset and Re-Pair the Camera and Monitor
Pairing problems do happen, but they should not be your first assumption. Confirm power and antenna connections before resetting everything.
Power-Cycle the System
Turn off the monitor and camera power.
Allow the system to shut down completely.
Restore power and test again.
Some temporary electronic glitches disappear after a complete restart.
Avoid assuming every brand requires the same reset time.
Follow your owner’s manual when a specific procedure is provided.
Put the Monitor Into Pairing Mode
Open the monitor’s camera settings.
Select the correct camera channel and begin pairing.
Instructions vary considerably between manufacturers.
Use the procedure designed for your exact model.
Press the Camera Pairing Button
Many cameras have a small pairing button near the rear housing.
Some require a short press. Others require holding it briefly.
Follow your manufacturer’s instructions rather than guessing.
Pair With the Monitor Close to the Camera
Pair the units while they are reasonably close together.
This removes long-range wireless reception from the process.
Once pairing succeeds, move the monitor back to its normal location.
Confirm the Correct Camera Channel
Multi-camera systems can use several channels.
Make sure you are viewing and pairing the intended camera position.
You might have separate channels for:
- Rear camera
- Left side camera
- Right side camera
- Door camera
A wrong channel can look like a failed camera connection.
What If the Camera Disconnects Only While Driving?
A camera that works while parked but disconnects underway usually deserves a close inspection for movement-related problems.
Check:
- Loose 7-way connector
- Poor camera wiring
- Loose ground connection
- Antenna moving in the wind
- Weak wireless range
- Vibration-sensitive camera electronics
- Unstable running-light power
- Tow-vehicle power compatibility
- Loose monitor power cable
Try this simple test before replacing anything.
If the system runs reliably while parked but loses connection every time you hit rough pavement, inspect physical electrical connections first.
Repeated pairing probably will not solve a vibration problem.
What If the Camera Disconnects When the Headlights Turn Off?
This usually means the camera receives power from the trailer’s running-light circuit.
Many prewired travel trailers use that circuit because it provides convenient 12-volt power at the rear marker light.
When the running lights turn off, camera power disappears too.
Try switching your headlights or running lights on manually.
If the image returns immediately, the camera itself may be working normally.
You will then need to decide whether running-light-controlled operation suits your needs.
Do not change the wiring unless you understand the circuit involved.
What If the Camera Works While Parked but Loses Signal on the Highway?
Highway driving introduces conditions your driveway cannot reproduce.
The trailer is vibrating. Antennas are moving. Electrical connectors are flexing. The monitor is also farther from the camera than during close testing.
First inspect connections for movement.
Then check signal strength from the driver’s seat.
If the camera remains powered during every disconnect, focus more heavily on antennas, distance, obstruction, and interference.
If the camera itself restarts, focus on power.
What If Only One RV Camera Keeps Disconnecting?
Multi-camera systems are useful for diagnosis. One failing camera usually narrows the problem considerably.
Check that camera’s:
- Antenna
- Power wire
- Ground
- Connector
- Assigned channel
- Mounting location
- Weather seal
- Internal electronics
If every other camera remains stable, a shared monitor problem becomes less likely.
When possible, swap channels or test another compatible camera.
That can help isolate the failed component.
What If All the Cameras Disconnect at the Same Time?
When every camera drops simultaneously, look for something they share.
Start with the monitor and its power source.
Then inspect common receiver hardware and shared electrical circuits.
If several trailer cameras share one power source, check that circuit too.
Multiple cameras failing at exactly the same moment usually points away from several independent camera failures.
Check for Water Damage, Corrosion, or Camera Hardware Failure
If basic troubleshooting does not solve the problem, inspect the equipment itself. Moisture and vibration eventually damage outdoor electronics.
Inspect the Camera Housing
Look carefully around the lens and housing.
Watch for:
- Condensation
- Cracked seals
- Water behind the lens
- Loose housing screws
- Damaged mounting bracket
- Cracked antenna base
Water intrusion can create intermittent faults before complete failure occurs.
Inspect Connectors Behind the Mount
Moisture sometimes enters from behind the camera rather than through the lens.
Check electrical plugs for corrosion.
Pay particular attention after heavy rain or RV washing.
A connection that turns green or white should not be ignored.
Check for Heat- or Vibration-Related Failure
Some electronic components work correctly while cold.
Then they begin failing after several minutes of operation.
Likewise, internal connections may separate only during vibration.
A camera that disconnects after warming up may have internal hardware trouble.
Test With a Known-Good Camera or Monitor
Component swapping can be extremely helpful.
If another compatible camera works perfectly on the same channel, suspect the original camera.
If the same camera works with another monitor, investigate the original monitor.
Only swap equipment when the system supports compatible components.
Wireless vs Wired RV Backup Camera Disconnect Problems
Wired and wireless systems share some failure points. However, their troubleshooting paths are not identical.
| Problem Area | Wireless Camera | Wired Camera |
| Camera power failure | Possible | Possible |
| Pairing problem | Possible | Usually not applicable |
| Wireless interference | Possible | Not applicable |
| Antenna failure | Possible | Not applicable |
| Distance or range issue | Possible | Not applicable |
| Damaged video cable | Usually not primary | Common possibility |
| Loose electrical connector | Possible | Possible |
| Running-light power issue | Common on trailers | Depends on installation |
| Monitor failure | Possible | Possible |
| Water damage | Possible | Possible |
If you have a wired system, do not spend time troubleshooting wireless interference.
Inspect the cable run, connectors, and monitor inputs instead.
Travel Trailer vs Motorhome Camera Problems
The troubleshooting process changes slightly depending on your RV type. Towable RVs introduce a tow vehicle and trailer connector that motorhomes do not have.
Travel Trailers and Fifth Wheels
Pay closer attention to:
- 7-way trailer connection
- Running-light power
- Tow-vehicle electrical output
- Long wireless distance
- Trailer wiring
- Camera ground
- Hitch-area cable movement
These systems often depend directly on the tow vehicle.
Class A, Class B, and Class C Motorhomes
Motorhomes usually require a different approach.
Focus more on:
- Chassis 12-volt power
- Monitor power
- Camera harness
- Video cable connections
- Dashboard electronics
- Vehicle fuses
- Long internal cable runs
A motorhome owner normally does not need trailer 7-way troubleshooting unless towing equipment is involved.
When Should You Replace the Camera, Monitor, or Antenna?
Replacement should come after diagnosis whenever possible. A few simple tests can help identify which component actually failed.
| Test Result | Likely Next Step |
| New antenna restores stable video | Replace old antenna |
| Camera works on known-good power | Repair original power circuit |
| Camera fails beside the monitor | Test camera or monitor |
| Another camera works on same channel | Original camera may be faulty |
| Original camera works with another monitor | Inspect original monitor |
| Failure began after water intrusion | Inspect or replace damaged camera |
| Wired image changes when cable moves | Repair cable or connector |
| Power disappears when harness moves | Repair wiring |
| All cameras fail together | Inspect monitor or shared circuit |
Replacing the entire system should usually be the final option.
When Should You Call an RV Technician?
Basic connection checks are often manageable at home. Permanent wiring repairs can require more electrical knowledge.
Consider professional help when:
- Wiring disappears behind finished RV walls.
- The circuit repeatedly blows fuses.
- Electrical connectors become unusually hot.
- Wiring insulation appears burned or melted.
- You find extensive corrosion or water damage.
- Voltage readings make no sense.
- A permanent circuit modification is needed.
- Camera power must be rerouted.
- You are unsure which wires are safe to modify.
Always stop the RV before troubleshooting.
Never climb around the vehicle, pair cameras, or adjust wiring while driving.
A backup camera should support safe driving, not distract you from it.
How Can You Stop an RV Backup Camera From Disconnecting Again?
Once the camera works properly, a little maintenance can prevent another frustrating failure.
- Inspect the trailer’s 7-way connector regularly.
- Keep electrical contacts clean and dry.
- Secure wiring so vibration cannot pull connections apart.
- Check camera antenna tightness before long trips.
- Inspect exposed wiring after rough-road travel.
- Keep camera mounting seals in good condition.
- Check for moisture after heavy rain.
- Confirm camera operation before leaving the campsite.
- Avoid crowding the monitor with unnecessary wireless equipment.
- Address intermittent problems before they become complete failures.
A thirty-second camera check before departure can prevent a lot of troubleshooting later.
Final Verdict
The best way to fix an RV backup camera that keeps disconnecting is to troubleshoot the system in the right order. Start with camera power, the 7-way connector, wiring, and ground. Then check antennas, wireless range, interference, and pairing.
Pay attention to when the failure occurs. Disconnecting over bumps points toward wiring. Disconnecting when headlights turn off suggests running-light power. Working only at close range points toward signal strength or antenna trouble.
Do not replace the camera simply because the monitor says “No Signal.” That message only tells you the monitor stopped receiving usable video. It does not tell you why.
Confirm stable power and a reliable close-range connection first. Those two tests can narrow the problem surprisingly quickly.
Related FAQs
Why Does My RV Backup Camera Keep Saying No Signal?
A “No Signal” message can appear when the camera loses power, falls out of pairing, has a loose antenna, experiences wireless interference, or develops a hardware problem. Confirm the camera remains powered before resetting or replacing anything.
Why Does My Furrion Backup Camera Keep Disconnecting?
A Furrion camera may disconnect because of unstable running-light power, a loose 7-way connection, antenna problems, wireless interference, pairing trouble, or tow-vehicle power compatibility. Start by checking continuous power at the camera.
Why Does My RV Backup Camera Work Only When the Headlights Are On?
Your camera is probably powered through the trailer’s running or marker lights. Turning the headlights on energizes that circuit and powers the camera. This setup is common on prewired travel trailers.
Can a Bad 7-Way Plug Cause an RV Backup Camera to Disconnect?
Yes. If your camera receives power through the trailer’s running-light circuit, a loose, dirty, or corroded 7-way connector can interrupt power and make the camera repeatedly disconnect.
Why Does My Backup Camera Disconnect When I Hit a Bump?
A bump-related disconnect usually suggests loose wiring, a poor ground, a loose 7-way connector, or a damaged internal connection. Inspect physical electrical connections before focusing on wireless pairing.
Can Low Voltage Cause an RV Backup Camera to Lose Signal?
Yes. A wireless camera needs reliable electrical power to operate its transmitter. Low or unstable voltage can stop transmission temporarily and make the monitor display a signal-loss warning.
Can Wi-Fi Interfere With an RV Backup Camera?
Yes, some wireless camera systems can experience interference from nearby Wi-Fi, hotspots, Bluetooth devices, or other radio equipment. Temporarily turning nearby transmitters off can help confirm whether interference is involved.
Why Does My Backup Camera Work Up Close but Not From the Truck Cab?
If the camera works near the monitor but fails from the cab, power and pairing may be fine. Weak antennas, long distance, RV construction, or wireless interference are more likely causes.
Do I Need to Re-Pair My RV Backup Camera Every Time It Disconnects?
Normally, no. Repeated disconnects often indicate unstable power, antenna trouble, or another underlying fault. Constantly re-pairing the system may temporarily hide the real problem without fixing it.
Can a New Truck Make My RV Backup Camera Stop Working?
Yes, certain camera and tow-vehicle combinations can have power compatibility problems. If the camera worked with your old vehicle but became unstable immediately after changing trucks, investigate trailer-light power output.
Does an RV Backup Camera Need a Constant 12-Volt Supply?
An RV camera needs stable power within its manufacturer’s specified voltage range while operating. Many systems use approximately 12-volt RV power, but exact requirements depend on the camera model.
How Do I Know Whether My RV Backup Camera or Monitor Is Bad?
Test the camera at close range using stable power. If possible, try another compatible camera, monitor, or channel. Component swapping can reveal whether the failure follows the camera or stays with the monitor.

Ethan Walker writes about travel routes, outdoor exploration, and road-based adventures. His guides focus on simple planning, dependable gear, and realistic travel advice. He values comfort, safety, and practical experience over hype.